Showing posts with label 12 Days of Star Wars. Show all posts

Wednesday, May 4, 2016

12DoST #6: Rathtar Oreo Truffles

Happy Star Wars Day! And May the 4th be with you!
Picture
[Source]
I have a history of Star Wars themed posts on this blog. You might think I only make scarves and Star Wars crafts! That isn't entirely true, but I do love them both (whoa methinks a Star Wars themed scarf?!)


As I was brainstorming a post for May 4th, my brain was so full of half-baked and phony Pinterest pins I couldn't come up with anything original. Well, I turned to my creative, Star Wars fanboy. He delivered. And now I can present to you:

Rathtar Oreo Truffles!*
[Source]
* Much tastier than this guy looks!

You will need: 
1 package Red Velvet Oreos
1 8oz package of cream cheese -softened- ("Neufchatel Cheese" pictured below)
---------
Red Vines
Mini Oreos
M&Ms (any kind that have orange, may need multiple packs!)
Chocolate chips or any kind of melting chocolate


Instructions: 

To make the Oreo truffles: 
1. Crush the oreos in a blender, bag, or food processor. Depending on the sweetness level, you may remove the cream filling if desired. Since the cream cheese flavored filling on these Oreos is an integral part of flavor (and I have a sweet tooth!) I left it in. 

2. Cut up the softened cream cheese a little and mix into the cookie crumbs. 

3. Roll into balls and put in the fridge/ freezer to firm up so they are easier to decorate.


To prepare decorations:
4. While the truffles are cooling get your decorations ready. I cut the vines in half long-wise, then again short-wise (is that a word?). They were still plenty long to serve as gangly Rathtar legs. 

5. Separate out your orange M&Ms. I found crispy M&Ms on clearance at the local dollar store. Score! But there were only about 4 oranges in each package. Plan accordingly. 

6. Separate your mini Oreos and use a small knife or toothpick to give it deathly sharp teeth. 
TIP: Cool the Oreos for a bit so it is easier to work with the creme filling! 

7. Melt your chocolate right before taking the truffles out of the fridge so it is nice and liquid for decorating. This will be the "glue" to hold the decorations in place. 
TIP: I use a little bit of shortening when I melt my chocolate chips. 


Get to decorating! (I hope you find the picture tutorial below helpful):

8. Place a dot of melted chocolate for the Oreo "mouth" and stick on the prepared mini Oreo/ jaws of death. 

9. Using a bamboo skewer or similar instrument, poke holes in the body for all the legs. Dip the Red Vine legs into the melted chocolate and place inside the hole you made in the body. 

10. Lastly, those horrible eyes!! By now you know the drill- dollops of melted chocolate, then your M&Ms on top. 

Eat right away or refrigerate before serving.


There you have it! Your very own creepy and tasty Rathtar Oreo Truffle. Make sure to make a whole pack of them because as we will never forget the Trillia Massacre, they hunt in packs. 


Happy May the 4th! Post your creations below or #kwidcreations on Instagram! 


Wednesday, December 9, 2015

12DoST #8: Vehicle Origami

I used to go steady with origami. We had a nice solid relationship where I was totally obsessed. Birthdays and Christmas I would ask for origami paper, calendars, books. It probably started with Sadako and the Thousand Paper cranes. I thought of how incredible it would be to know how to make a paper crane AND make 1,000. Soon after, I learned how to make a paper crane. And it just took off from there. I would squirrel away scraps of paper and fold little boxes and flowers, lizards and goldfish.

Origami was so fantastic because it was like a smart kid puzzle I could do all by myself. I like visualizing things. I learned the symbols and folds and I forced myself to try and try again until I could execute the patterns perfectly. But enough of that poetry. Time to tie it in to the Twelve Days of Star Wars.

I'm not into trains, planes or cars in general. But the vehicles in Star Wars are incredible. I tend to be more interested in them than the creatures. They are just so fascinating. I knew that one of my countdown crafts had to include a starfighter or two.

It's been awhile since Origami and I fizzled out. Life gets busy and sometimes that happens *tear.* So what better way to re-kindle the fire then trying out some Star Wars origami?!

Most of the sources I used can be summed up quite nicely in this BuzzFeed Post.

Being the pack-rat that I am- I have this old origami calendar. It was (obviously) a genius idea to keep it because it came in handy today. The designs are intricate so it is a good idea to use thin origami paper. Even if it be from *gulp* 2005.

The first one I tried was the X-Wing Fighter by Alex Crosse HERE.


I'm obsessed with the way it turned out and proud that I was able to figure it out after all this time. I still got it! ;)
[Source]
Second I tried out the A-wing. It is listed as easy and I was riding high (pun intended) from my success with the X-wing. It didn't turn out as great as the X-wing But I like the way the red and white worked together perfectly.


Millennium Falcon was next from this infographic. It was definitely the simplest but... I'm not sure. Looks kinda like a blob. The orange paper isn't helping much either.


Lastly, a TIE Fighter from this YouTube video. I guess I saved the best for first because my first reaction after 5 minutes of trying to make it actually look like a TIE Fighter, was pants-wetting laughter.


You win some you lose some, but I had a blast trying them out and I definitely love the pattern for the X-wing.


This infographic is huge but check it out!

[Source]

Tuesday, December 8, 2015

12 DoST #9 & (Two Cent Tuesday #3): Jabba the Hutt Cupcakes

Even as I type this I am holding back tears of laughter.

But first things first. Today I am combing my epic 12 Days of Star Wars series with my Two Cent Tuesday series.


And I give you:

[Source]
I can't stop staring.

What are your two cents? Yay or nay? Pick one:
a) I would pay money for this. 
b) I would make this myself. 
c) I would take this if it was free! 
d) No. 

My thoughts:

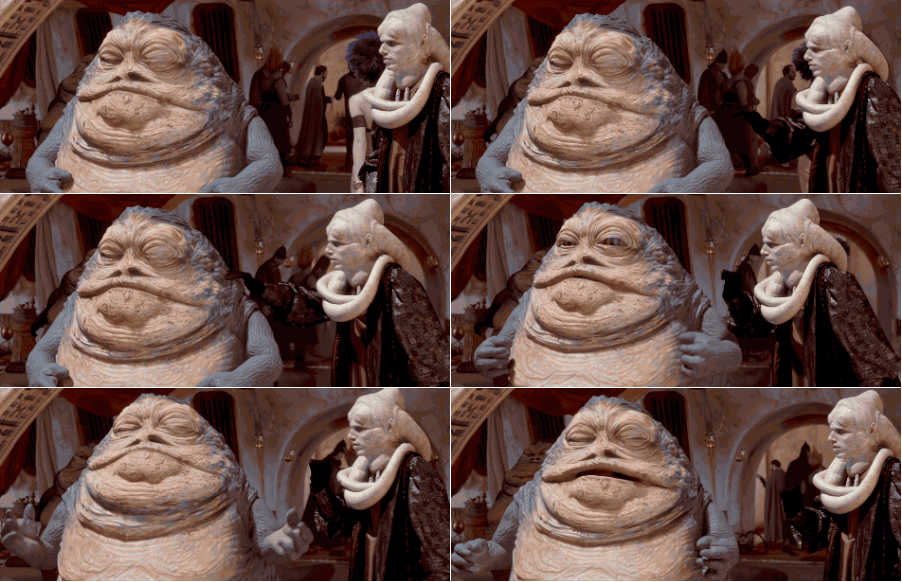
I LOVE it! It is a very creative concept. Most of my cupcakes accidentally look like this. But the coloration is epic. The saggy judging eyes are spot on.

sleeping wake up jabba the hutt
[Source]
But holy crap that thing is scary lookin! Also, Jabba is just a huge puddle of frosting and I just couldn't do that. You'd go to take a bite and get a mouthful of Jabba. I'm already gagging. Is there even a cupcake underneath there?!

The real question is: Do I crave cupcakes now whenever I see Jabba? or has Jabba ruined cupcakes for me forever?

What are your Two Cents?


Monday, December 7, 2015

12 DoST #10: Saga Graphgan

Mondays are hard. Blogging every day is hard. So today I wanted to feature an absolutely stunning Star Wars project that I most definitely could not make in a day (or week or month if we are counting).


Ophelie from ahookamigurumi.com is incredibly talented. I first found her on ravelry.com via her Star Wars blanket:


Find the direct link HERE.

I cannot stop staring at it. The technique uses graphs, and from each graph you make a square. Then you sew all those squares together. Don't forget color changing and weaving in ends -my LEAST favorite thing to do. I bow before the beauty- the time and skill it would take to create and finish something like this.

Even if you aren't interested in re-creating her project. I highly suggest you check out the blog post here. I love how she picked each of the squares and made the charts. You may notice that they are in chronological order. So cool.

Although this project is very overwhelming, I think a smaller scale one would be really fun.


Sunday, December 6, 2015

12 Days of Star Wars #11: Lightsaber Crochet Hooks

On the 11th day of Star Wars my true love helped me with:


Originally I saw this post from Doddle Craft on how to make polymer clay lightsaber pens. I thought it would be a fun craft that would bring the Star Wars theme to my everyday life. Pens. I use pens a lot. But then the gears really started moving and I thought of something I use even more, crochet hooks! Perfection. Lucky for me I already have a ton of hooks in varying colors. 

I was pretty excited for this project because I have only worked with polymer clay one time before- with my friends in Grenada. I really enjoyed the experience but I'm at the point where I have to limit new crafting ventures to the space and money I have. 

Buuut... No harm in buying a couple blocks of polymer clay riiight? I now realize it is a slippery slope because this project was simple and fun (aka addicting). 


You will need: 
Metal crochet hooks
Polymer clay 
Hard surface or cutting board you don't mind permanently donating for clay and craft projects
Full disclosure: I bought one Sculpey brand and two Craft Smart brand polymer clay bricks. Since I didn't want to fork over the money for black clay (cheapo) I used a Wilton food gel to color the gray clay. Buuut verdict is still out as to whether or not it will continue to stain my hand black...
There really is no formal tutorial for this. First glop the gray clay on the handle of your hook and roll it around til smooth and shaped the way you desire. I made mine a little thinner at the top. 

Next, spend the following 2+ hours adding embellishments and semi-obsessing over replica accuracy. Feel free to use this guide to lightsabers in your quest, this one is also helpful. Ooooor just make up one on your own!

I baked them on parchment paper, according to package directions for 15 minutes in a 275 degree F oven. I'm not sure what makes them "done." But I took them out and let them cool. 

Oh so cool.


Can you tell who's lightsabers I made? 

Obi-Wan Kenobi (A New Hope) 
Mace Windu 
Qui-Gon Jinn

Lastly, I painted some mod-podge over the clay. The black still appeared to be running a bit, so I will let it dry and see how well the color sealed. Maybe I'll just stick to paying < $2 for legit black clay next time. ;) 

Which lightsaber is your favorite, or which one would you like to try to make? 


Saturday, December 5, 2015

12 Days of Star Wars #12: Snowflakes

Now that Thanksgiving is over, and we are well into December it's time to start counting down. Counting down to STAR WARS!!!


I've already got my ticket to see it Thursday December 17th. What a better way to anticipate the release than a count down with Star Wars themed creativity!

I presented The 12 Days of Star Wars! 

On the 12th day of Star Wars: 


While I was perusing for Star Wars themed crafts I found this amazingly talented person

This designer has created 33 different patterns for Star Wars snowflakes. They are all incredibly detailed. They are made the traditional way with folding and cutting. As magical as it is to unfold and see the creation, I just don't have the patience to make all those tiny little cuts. Instead I cheated. 

I dusted off my Silhouette machine.

Go ahead and pull the image you want into the Sillhouette software. Re-size however you'd like. 
Trace (on toolbar) > Select Trace Area > Highlight area to trace. 
Make sure to uncheck the High Pass Filter box > Trace button. 
Drag away the original image/ JPEG and delete. 
Right click > Release Compound Path

Now you can remove the square around the image as well as any details you don't want. I cleaned up some of the designs because they were too small and I didn't feel like weeding them. 

Watching my Silhouette at work never gets old. 


This project was even easier than I expected. Even the weeding took less time than I thought. 


I think the General Grievous is pretty cool. But I also really like the the BB-8. 


I strung them up with some embroidery thread. I usually can't stand my white walls but I love the way the snowflakes look against them. 


Hanging up with the other Christmas decorations. 


Day 12: COMPLETE!