Sunday, January 17, 2016

Quilted Headboard {Free Tutorial}

A long time ago in the far far galaxy of my mind, I came up with this idea to make a headboard for my bed. Traditional headboards never seem to work well and I wanted something simple, lightweight, and pack-able since I seem to move about once a year.

I love my comforter just as much as when I first got it 4 years ago. Comforters for some reason or another are always an investment, so I figure this one isn't going anywhere soon. The one "issue" I have with it is that the predominant color is that off-white/ cream color. There isn't enough orange and brown and green and yellow. I am a person who needs her color, so I thought a headboard would be the perfect addition to bring color and decoration to my boring walls.

I found this semi-tutorial on Pinterest (which apparently and sadly is now a private blog). It seemed simple enough and my dad is the master craftsman so I knew he would be happy to help me out.


Honestly, he was just excited to have the excuse to possibly get a new tool. See above photo of him cruising the "Tool World" section of Lowe's. 

Back at home we made quick work of putting together a frame. We figured 64" x 35" would be good. My dad made sure that the top piece was a nice thick piece of oak and we even put flat planks on the front to square it up and provide a little more stability. Particularly for the front where there would be the most wear and tear (read: me thrashing and throwing pillows in the night). 


Gathering fabrics has been quite the process. I started with some some scraps and it slowly evolved and became more sophisticated. Here is one of the first renditions with my comforter below to try and match the colors. 


And yet another, with the more-portable pillow sham.


I finally started nailing down a pattern when Jen revolutionized my life with the suggestion to put some stripes horizontal.


It was a bold move. And one that paid off!

I am not a quilter. Heaven help us all I am not. I'm not even a sewer really. Most of this project was spent fighting with my machine because the bobbin tension was off. But I got it to work and eventually pieced together this beauty!

Once again: I have never pieced together a project like this! So I am really proud with the way it turned out.

After getting that all ironed out (literally). I went ahead an staple-gun-palooza'd the batting to the frame. Then oh so carefully started stapling the fabric piece on top. It might be possible that I have never not breathed for so long. I was just waiting for something to go wrong- but it looked great!


The big reveal of the finished product is the whole reason I create. I could feel a huge grin sweep over my face. I made that! I brain-engineered it! I love the feeling of satisfaction I get when I plan, execute, and finish projects.


Ta-da! New headboard!
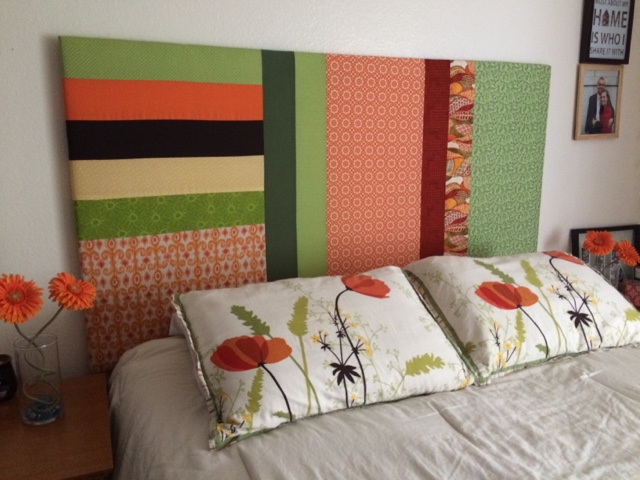


If you have any questions about the project feel free to contact me! What colors would you pick for your headboard?

EDITED TO ADD: The headboard has been up for 3 months now and it holding up great! A big project but great "pay-off."


Sunday, December 27, 2015

Pip's Hat

I suppose I have been in a hat-making mood! I have lots of friends living in the Land of Frost and I think hats make a perfect handmade and practical gift for giving. My cute friend Pip hails from the land of Minnesota so she is no stranger to cold. She has a perfectly adorable style so I thought this cabled beanie from All About Ami would be perfect for her.


I went with a rather neutral gray. I wanted something that would match lots of her outfits without detracting from them. Buut I also know that gray is just way too much NOT Pip, so I jazzed it up with a multicolor pom pom in her favorite colors.


Oh wait...did someone say pom pom?! Oh! Better use that pom pom maker! *fist pump* 


I rather like the combination and balance between practical and fun in this hat. It was the perfect opportunity to practice cables, which I originally embarked on for the Zucchini Cable Scarf. Cables are definitely trendy right now, but also very classic.

The only modification I would consider for the pattern would be to maybe do the band a hook size down, just so it fits nice and snug. But it is a great pattern and All About Ami's patterns are all amazing. They are so easy and enjoyable to make. Look how cute she is hiking in Arches National Park!


Saturday, December 26, 2015

Pattern Review: ZiggyZag Vixen Slouch Hat

Let's face it- 12 Days of Star Wars was a bit of a flop. Just too many things going on. Every once in a while it is important to take a deep breath and lessen the stress. 12 Days of Star Wars had to go. But don't worry! I will bring it back. Maybe a build up for May 4th for Star Wars day?!

I feel like I am swimming in yarn. Somehow I always imagined it would be a much more enjoyable experience. I have Christmas presents to make and a massive scarf custom order (10+ scarves!) to finish. I am happy to report that the scarves are finished (read about it here). Now it's just finishing up Christmas gifts. But enough chatter, time for pictures and sharing!


I would like to introduce the ZiggyZag Vixen Slouch hat by designer Faith Holbrook. I originally snagged this pattern when she posted her rough draft version on a Facebook crochet page. I haven't yet bought the paid pattern but I imagine it could only be better than the original! I highly recommend it.

The first version I tried out was for a Christmas gift for my friend Kelli. I wanted to incorporate the colors from a pair of gloves and socks I got her as part of a sledding themed gift. I think it turned out pretty well!


It ended up being a little slouchier than I prefer, so subsequent versions I shortened a little. I removed a couple rows of v-stitch and a a row or so on the brim. These two were for my nieces who are pre-teen/ teen (holy crap when did that happen?!) so I didn't want them too large.

This was also the perfect excuse to get the smaller pom pom makers since I'm not sure how "cool" big fluffy pom poms are these days.


This hat is really fun to make! It's simple and you don't have to worry about constantly counting stitches, so it works up fast. Which is exactly why I decided to make one for myself. All this snow has me in the mood for sledding. A bright and festive hat is a must!


What do you think? Which color combo is your favorite or what color combo would you like to see? I hope you are enjoying the holidays and staying warm (at least for me!)


Thursday, December 10, 2015

Festive Little Bow

If I think the holidays sneak up on me.... holiday parties are even worse. Just meaning that they always come even before the holidays and before you know it you need 3 gifts for a gift exchange, cans of food to donate, toys to donate, and so much more. Well you get all that purchased then you realize that the gifts that need wrapping have none.

You know you're not going back to the store. But you don't wanna be a Grinch. So you do what you are at least semi-good at, and get creative! 

I had this pretty standard gift bag but I wanted to spice it up a little. Enter: festive bow embellishment. 


It is a simple enough idea that I created mis-mashing two ideas that are fairly commonplace.


The curled ribbon ends: Maz Kwok's Designs

I made the bow first (but stop before you wrap around the center), then the tails, slip stitch, second tail, slipstitch, then use yarn to wrap around the center. Simple! 


Small embellishments like this are great because they are so versatile and quick.


Wednesday, December 9, 2015

12DoST #8: Vehicle Origami

I used to go steady with origami. We had a nice solid relationship where I was totally obsessed. Birthdays and Christmas I would ask for origami paper, calendars, books. It probably started with Sadako and the Thousand Paper cranes. I thought of how incredible it would be to know how to make a paper crane AND make 1,000. Soon after, I learned how to make a paper crane. And it just took off from there. I would squirrel away scraps of paper and fold little boxes and flowers, lizards and goldfish.

Origami was so fantastic because it was like a smart kid puzzle I could do all by myself. I like visualizing things. I learned the symbols and folds and I forced myself to try and try again until I could execute the patterns perfectly. But enough of that poetry. Time to tie it in to the Twelve Days of Star Wars.

I'm not into trains, planes or cars in general. But the vehicles in Star Wars are incredible. I tend to be more interested in them than the creatures. They are just so fascinating. I knew that one of my countdown crafts had to include a starfighter or two.

It's been awhile since Origami and I fizzled out. Life gets busy and sometimes that happens *tear.* So what better way to re-kindle the fire then trying out some Star Wars origami?!

Most of the sources I used can be summed up quite nicely in this BuzzFeed Post.

Being the pack-rat that I am- I have this old origami calendar. It was (obviously) a genius idea to keep it because it came in handy today. The designs are intricate so it is a good idea to use thin origami paper. Even if it be from *gulp* 2005.

The first one I tried was the X-Wing Fighter by Alex Crosse HERE.


I'm obsessed with the way it turned out and proud that I was able to figure it out after all this time. I still got it! ;)
[Source]
Second I tried out the A-wing. It is listed as easy and I was riding high (pun intended) from my success with the X-wing. It didn't turn out as great as the X-wing But I like the way the red and white worked together perfectly.


Millennium Falcon was next from this infographic. It was definitely the simplest but... I'm not sure. Looks kinda like a blob. The orange paper isn't helping much either.


Lastly, a TIE Fighter from this YouTube video. I guess I saved the best for first because my first reaction after 5 minutes of trying to make it actually look like a TIE Fighter, was pants-wetting laughter.


You win some you lose some, but I had a blast trying them out and I definitely love the pattern for the X-wing.


This infographic is huge but check it out!

[Source]

Tuesday, December 8, 2015

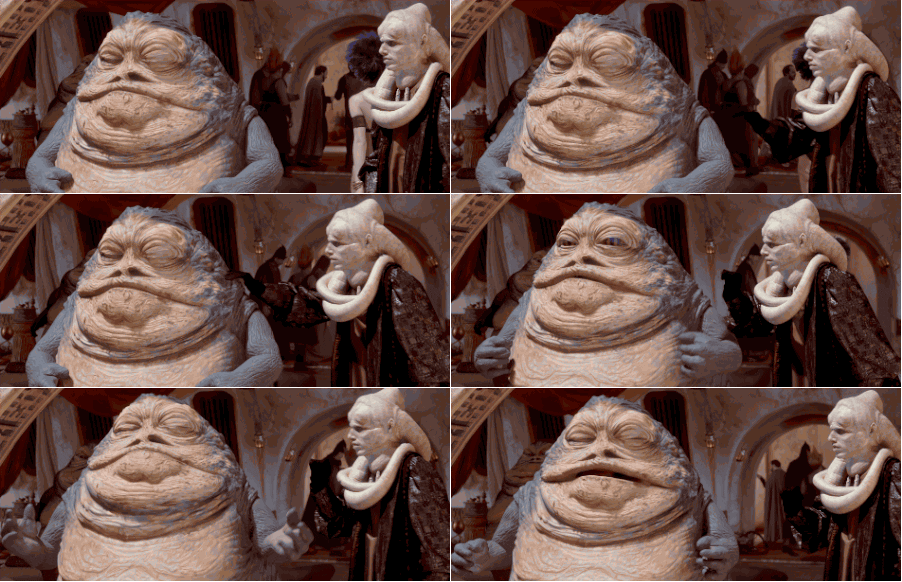
12 DoST #9 & (Two Cent Tuesday #3): Jabba the Hutt Cupcakes

Even as I type this I am holding back tears of laughter.

But first things first. Today I am combing my epic 12 Days of Star Wars series with my Two Cent Tuesday series.


And I give you:

[Source]
I can't stop staring.

What are your two cents? Yay or nay? Pick one:
a) I would pay money for this. 
b) I would make this myself. 
c) I would take this if it was free! 
d) No. 

My thoughts:

I LOVE it! It is a very creative concept. Most of my cupcakes accidentally look like this. But the coloration is epic. The saggy judging eyes are spot on.

sleeping wake up jabba the hutt
[Source]
But holy crap that thing is scary lookin! Also, Jabba is just a huge puddle of frosting and I just couldn't do that. You'd go to take a bite and get a mouthful of Jabba. I'm already gagging. Is there even a cupcake underneath there?!

The real question is: Do I crave cupcakes now whenever I see Jabba? or has Jabba ruined cupcakes for me forever?

What are your Two Cents?


Monday, December 7, 2015

12 DoST #10: Saga Graphgan

Mondays are hard. Blogging every day is hard. So today I wanted to feature an absolutely stunning Star Wars project that I most definitely could not make in a day (or week or month if we are counting).


Ophelie from ahookamigurumi.com is incredibly talented. I first found her on ravelry.com via her Star Wars blanket:


Find the direct link HERE.

I cannot stop staring at it. The technique uses graphs, and from each graph you make a square. Then you sew all those squares together. Don't forget color changing and weaving in ends -my LEAST favorite thing to do. I bow before the beauty- the time and skill it would take to create and finish something like this.

Even if you aren't interested in re-creating her project. I highly suggest you check out the blog post here. I love how she picked each of the squares and made the charts. You may notice that they are in chronological order. So cool.

Although this project is very overwhelming, I think a smaller scale one would be really fun.